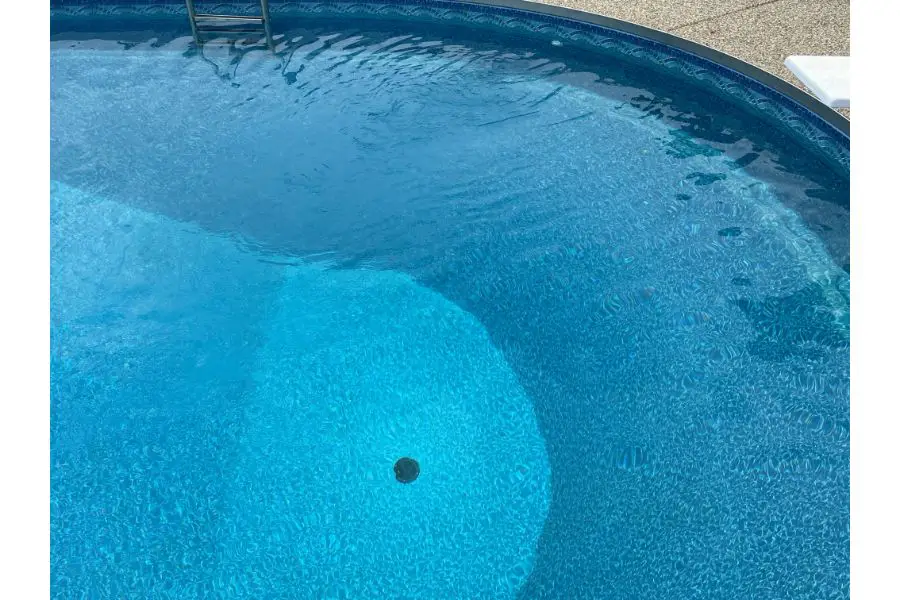
One of the best ways to enjoy a warm and sunny day outside is by lounging at the pool. But as we all know, owning a pool is not always smooth sailing.
While pools require routine care to keep the water clear, there’s also potential for emergency repairs to crop up. One of the most dreaded scenarios for pool owners is when the water level drops unexpectedly, as this often signifies a leak.
Leaks can occur in any type of above-ground or in-ground pool, but are most commonly encountered with vinyl-lined or inflatable pools. Sometimes all it takes is a sharp toenail to bump into the liner with enough force to cause a small pinhole, while other times, a hole could develop simply due to an aging liner.
Regardless of how the leak developed, a hole in the pool can often be patched with relative ease even if you don’t have an actual patch kit!
In this post we’ll detail how to patch a pool without a patch kit. In many cases, simple household materials can be used to take care of leaks in all types of pools, such as inflatable, vinyl lined, fiberglass, and even concrete.
While leaks can occur at virtually any location in the pool, including the plumbing and equipment, this post will focus on repairing leaks of the pool shell itself.
Let’s dive in!
How to Find a Leak in the Pool Liner
In many instances, you may not be aware of a leak in the pool until you’ve seen a sizable drop in water level that can’t be explained by normal evaporation. Or, maybe you’ve noticed a large drop in water after removing the winter cover and have confirmed it’s not just water displacement.
At this stage, it’s important to figure out exactly where the leak is so that you can put an end to the water loss.
Here are some methods you can use to find a leak in the pool liner:
1 – Visual Inspection
This is an obvious first step to take as it’s the easiest. Walk around the perimeter of the pool and look for signs of a tear, puncture or crack.
Areas that appear to be more worn than others, or have debris and algae accumulating in the same spot, could be indicative of where the leak is.
If you don’t see any damage from afar, grab some goggles and dive underwater for a closer inspection. While underwater, take a patterned approach to scan the entire floor, walls and corners.
Sometimes, holes that are just a fraction of an inch can be the cause of significant water loss, so take time to look closely.
2 – Dye Test
If a visual inspection is unable to locate the leak, it may be time to perform a dye test. This test relies on a colorant, such a food coloring or phenol red (pH indicator), to help you find the exact location of the leak.
The gist of the dye test is to add colored water into the pool and watch to see if it gets drawn through the liner in a specific area, as this would signify a leak.
To conduct the test, ensure the pump is off and the water in the pool is still. Fill a syringe or eye dropper with colored water. Pro Tip: Phenol red tends to linger around longer to allow a better viewing duration than just normal food coloring.
While wearing goggles, move to the general area of the suspected leak and slowly expel the dyed water within a couple inches of the liner. Take care not to move as you watch the dye float through the water.
If you see the dye flowing through the liner, this could signify a leak. Carefully inspect the area to confirm whether there’s a hole or crack.
Since the dye test can be cumbersome, it’s best applied if you have a general suspicion of where the leak may be. For instance, if you noticed that a large branch had fallen into the pool, but can’t visually see a hole, the dye test may be of use.
The dye test is also great if trying to find leaks around pool fittings, underwater lights, or skimmer boxes.
3 – Professional Leak Detection
While we all like to save money, sometimes it pays to have a professional come out to find the leak. They have special scopes that allow them to hear water flowing underwater to pinpoint the exact location.
The professional leak detection can usually find leaks whether it’s coming from the pool shell, fixtures or the plumbing lines.
Finding a Leak in an Inflatable Pool without Water
If you have an inflatable pool that seems to be losing air, it’s likely that you have a leak. This could make it difficult to keep the pool upright to hold the water.
If the leak is on the inside of the pool, you may see bubbles coming up through the water. This would be a tell-tale sign of where the leak is.
Otherwise, take a walk around the perimeter of the pool. Look for any visual signs of damage and also listen for a hissing sound, as this would signify location of the leak.
If still have difficulting find the leak in your inflatable pool, here are some additional steps you can take:
1 – Get a spray bottle and fill it with water and dish soap.
2 – Spray the soapy water all over outside of the inflatable pool.
3 – Watch for soapy bubbles forming as this would indicate location of the hole.
4 – Use a marker to mark the spots where you need to patch.
How to Patch a Pool Without a Patch Kit
Now that you’ve figured out where the leaks and holes are, it’s time to patch them up. Many of these methods allow for underwater repair without needing to drain the pool!
Before attempting any of these options, try to wipe down the area with a cloth to remove any debris or algae from the area. This will give you the best chance at obtaining a watertight seal.
Here are some of the easiest and most effective methods to seal up the holes without a patch kit:
1. Sealant Tape
The first method that you can use to patch a pool is to use a watertight sealing tape. Some examples are silicone tape, butyl tape, vinyl tape, and rubber tape.
Duct tape may also work if you’re in a bind, but don’t expect it to last as long as the sealant tapes.
Depending on the type of tape, you may be able to apply it underwater without having to drain the pool. You can determine this by looking at the tape manufacturer’s instructions.
Here’s how to use the sealant tape:
Step 1: Cut the Tape
Start by cutting an appropriately sized piece to patch the pool hole. Aim to cut the tape to provide an additional 2 inches of coverage on each side of the hole –don’t skimp!
Step 2: Patch the Hole
If you’re applying the tape underwater, keep the backing paper (if applicable) on it until you’re inches away from the hole. While underwater, remove the backing paper and quickly apply the tape to the surface.
Step 3: Remove Air Pockets
Press down firmly on all sides of the tape so that it sticks to the pool.
Step 4: Add a Second Layer
For additional protection, cut another piece of tape that is a bit larger than the original piece as this will provide overlap of the first layer. Apply the second layer in a similar manner as the first.
2. Underwater Epoxy (Pool Putty)
Underwater epoxy, also known as pool putty, can be used to patch leaks in concrete, fiberglass and vinyl pools without draining the water.
The epoxy comes in two parts of putty that are mixed together and applied to the damaged area. Within 24 hours the epoxy will harden like cement.
Always follow the epoxy manufacturer’s instructions for use, but here are some general steps:
Step 1: Knead the Patching Bond into a Ball
Start by removing small chunks of both parts of the epoxy. Roll and knead them together to form a ball in your hand.
Step 2: Apply the Epoxy Bond on the Pool
Once the epoxy is ready, apply it to the damaged section of the pool. Use your fingers to flatten it across the surface so that the hole is completely covered.
Step 3: Allow to Cure
Take care not to disturb the putty while it hardens. Epoxy is generally fully cured within 24 hours.
3. Vinyl Cement
PVC vinyl cement is an effective way to repair leaks for vinyl liners. It can be used both above or below water without needing to drain.
To use this cement, you’ll need a piece of vinyl to serve as the patch. Some options for this could be leftover liner from the pool, an old inflatable, or even a piece of tarp.
Step 1: Cut the Vinyl Patch
Start by cutting an appropriately sized piece to patch the pool hole. Aim to cut the vinyl to provide an additional 2 inches of coverage on each side of the hole.
Step 2: Apply the Vinyl Cement
If this is an underwater repair, apply the vinyl cement to one half of the patch. Allow it to rest for a minute or so, and then fold the other side of the patch onto the adhesive to protect it while underwater. You can unfold it while underwater.
If this repair is above water, apply the vinyl cement across the surface of the patch.
Step 3: Apply the Patch
Apply the patch to the damaged section of liner. Smooth out any air bubbles in order to form a watertight seal.
Step 4: Add a Second Layer
After allowing a day or so for the first layer to dry, you can add a second layer in similar manner to provide additional protection. For the second layer, ensure you cut the vinyl a bit larger than the original piece to provide an overlap.
4. Shoe Adhesive
If you have an inflatable pool, using shoe adhesive is surprisingly effective in patching holes. This also works great for other inflatable items, such as pool floats and toys. Just avoid this option if you have a traditional vinyl, gunite or fiberglass pool.
Shoe glue works well for inflatables as it’s durable enough to hold shoes together and is waterproof.
The primary drawback with using shoe adhesive for an inflatable repair is that the pool must be completely dry in order to apply it. Here’s how to use it:
Step 1: Ensure the Puncture is Dry
Using a clean cloth, completely dry the area to be repaired. If the leak is on the inside of the pool, you will likely need to drain water down to below the location of the hole so that it can dry.
Step 2: Apply the Adhesive to the Hole
Simply squeeze some of the shoe glue on the hole. Smooth it out, but ensure you leave a thick enough layer for durability.
Step 3: Fortify the Adhesive with Water Tight Fabric or Tape
To fortify the patching, you can apply an old scrap of inflatable float or a piece of tarp over the glue before it dries.
Alternatively, you can apply duct tape, but it won’t be as powerful as a tarp, but it’s durable enough for very small holes.
5. Hydraulic Cement
A crack in a concrete pool may result in significant leakage, and can be particularly worrisome. Fortunately, hydraulic cement can be used as a waterproofing solution in fixing the leak.
While it’s important to consider the root cause of how the crack formed, this method can help put a stop to the water loss.
If the leak is below the waterline, consider looking for hydraulic cement that is designed to be used underwater as you can avoid having to drain the pool. Some of these products can set in as little as 5 minutes and are able to withstand the hydraulic pressures at the bottom of the pool.
While you’ll want to follow the product-specific instructions, here are some general steps:
Step 1: Prepare the Surface
Use a wire brush to remove any loose concrete and paint. Attempt to chisel the crack into an upside down V as this will provide more surface area for the cement to bond to.
Step 2: Mix the Hydraulic Cement
Mix the cement according to the manufacturer’s instructions to form a putty consistency. You’ll want to only mix enough to apply before the setting time expires, which could be as little as 5 minutes.
Step 3: Apply to the Leak
Work the cement into the crack. Use a putty knife to smooth it out before it dries.
Step 4: Paint the Surface (optional)
If the hydraulic cement patch sticks out like a sore thumb, you can paint it to match the rest of the pool. If the repair was made underwater, you’ll need to wait to paint until you’ve drained the water and allowed the surface to dry.
Next Steps After Patching the Pool
Regardless whether you’ve used an official patch kit, or one of these alternative methods, it’s important to closely monitor the repaired area.
If you used a patch of some sort –such as an old piece of inflatable or a tarp– look at the edges to ensure they remain flat on the pool surface. If they start curling upwards, you may need to reapply some adhesive, and it may be worth adding another layer of patch for additional peace of mind.
If you used duct tape as part of your solution, you’ll want to perform a more robust repair when time permits. Duct tape is not designed to provide long-term waterproofing and may eventually develop a leak.
Also, if you have a vinyl liner, take its age into consideration. Many vinyl liners will not last more than 10 to 15 years before they become more prone to leaks. While you can keep trying to apply patches as leaks develop, at some point it may be time to perform a full replacement.
Final Takeaway
While a leaky pool is never a sight that anyone wants to see, you can often still patch the pool without a patch kit on hand.
When figuring out which method to use, it’s important to ensure that the material being used is suitable for underwater use and is compatible with your pool type. For instance, underwater epoxy is fairly universal for pool repairs, while hydraulic cement is limited to concrete pools.
Once you’ve made the repair, ensure to keep an eye on it over time. Some patch methods are not intended to be permanent repair, so you’ll want to be proactive if you see signs of wear and tear.
With all these various options, you may feel that repairing the leak is often easier than finding the leak!
Happy Swimming!
Husband and father of three (actually, four if you include the pool). I’m an avid DIY-er and weekend warrior that enjoys taking up new projects around the house to help us maximize leisure right at home. I enjoy researching and sharing various tips, tricks and knowledge to help others make their home an oasis.