Cast aluminum furniture has become increasingly popular nowadays. Not only are the designs usually intricate, but they can also withstand harsh weather.
That’s what makes cast aluminum excellent for patio furniture. However, even the toughest furniture may eventually experience chipping and discoloration.
In this post we’ll provide steps on how to restore cast aluminum patio furniture. Depending on the state of the furniture, your course of action will differ.
For scuffs and scrapes, you can try repainting the pieces. As for oxidation issues, it may be best to sand and refinish the cast aluminum.
Let’s jump in!
Cast Aluminum Patio Furniture
When you think of aluminum, your mind may not immediately imagine a strong metal. Instead, you may envision a weak, flexible metal similar to aluminum foil that covers food.
However, it’s safe to say that cast aluminum patio furniture is much stronger than aluminum foil. Aluminum foil is intentionally rolled thin so that it’s flexible, while cast aluminum made to be durable.
Cast aluminum is created by pouring molten aluminum into a mold and allowing it to solidify into a desired shape. The resulting product is lightweight and corrosion-resistant, which makes it a great choice for patio furniture.
Cast Aluminum Issues
Even though cast aluminum doesn’t rust easily, it can be susceptible to a couple of other issues.
For starters, cast aluminum can oxidize as it reacts with oxygen. As a result, the metal may become chalky white.
The casting process may also leave a rougher texture on the surface. If you’re hoping for a smooth, polished finish, you may need to look elsewhere.
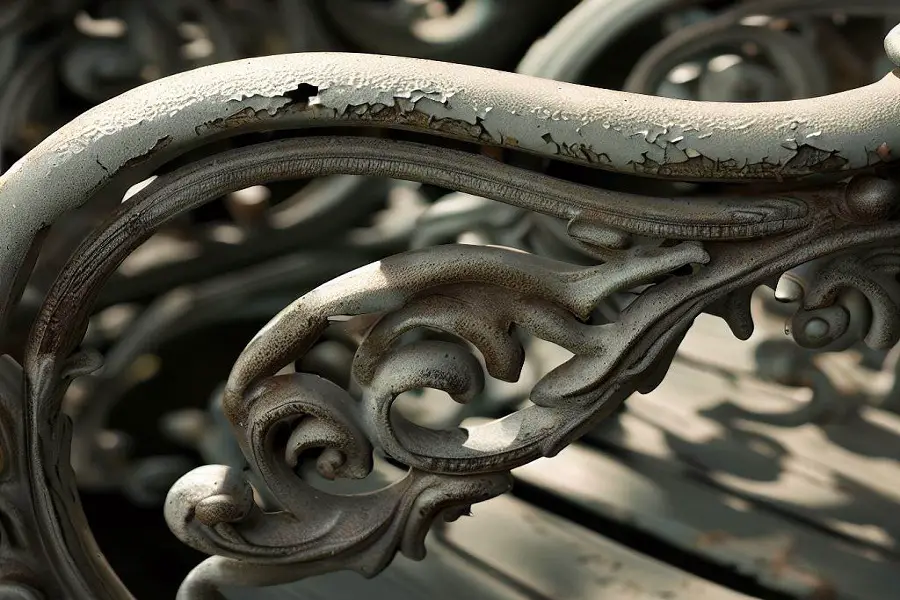
Cast aluminum furniture may be left in a natural state, but is more often finished with paint or powder-coating to provide enhanced protection. These top coats could become damaged due to scuffs and scrapes, leaving potential for oxidation or corrosion.
Depending on the state of the cast aluminum, the restoration process will be a little different.
Removing Oxidation From Cast Aluminum Patio Furniture
After a while in the sun and rain, a layer of oxidation film may begin to form on cast aluminum furniture. Even furniture that is painted or powder-coated could experience this oxidation, although it may be to a lesser extent than uncoated cast aluminum.
This layer of oxidation generally doesn’t affect the durability of the furniture, but it gives it a dull, lackluster appearance.
The good news is that it’s easy to fix. So, let’s dive into how to remove this layer and bring back the shine to your furniture.
Step 1: Gather Your Materials
It’s always good practice to gather your materials before starting any major project. This is especially true in this case because removing oxidation from furniture can be a messy process.
You’ll need:
- Tarp
- Sponge
- Two buckets
- Water
- Microfiber towel
- Sandpaper (400-grit for light oxidation, 100-grit for heavy oxidation)
- Vinegar or Lemon Juice
- Wax
- Gloves
- Face mask or respirator
Step 2: Prepare Your Space
Locate a nice empty area and lay out the tarp. The tarp should be large enough to fit you and the furniture on top. It’s there to help collect any sanding dust for easier cleanup.
Place the furniture onto the tarp allowing plenty of space to access all sides of the furniture.
Add equal parts of either vinegar or lemon juice into a bucket with warm water.
Step 3: Prepare Your Patio Furniture
Now that the space is ready, you can start prepping the furniture. First, break out your sponge and soak it in the cleaning mixture.
Scrub the entire surface of the furniture. Make sure you get all the fine details between all the nooks and crannies. You can use a toothbrush to help with really tight spaces.
Remove any built-up dirt or debris and scrub down the cast aluminum well. Then, rinse the furniture with warm water.
Finally, wipe the furniture down with a microfiber towel. The fine texture of the cloth will help remove any leftover debris and help absorb all the water.
Step 4: Sand Your Patio Furniture

If the vinegar solution didn’t remove the oxidized layer from the surface of the cast aluminum, some elbow grease may be required.
Sanding the layer of oxidation is the next course of action. Before jumping in, make sure you wear safety gloves and a face mask as this could generate small particles of metallic dust.
You can start with 400-grit sandpaper which will remain fairly gentle on the furniture. If you still see signs of oxidation, aim for a coarser sandpaper, such as 100-grit. It’s worth testing the sandpaper on inconspicuous areas to ensure it doesn’t ruin the detailing on the furniture.
Start on one end of the furniture and make your way to the other using small circular motions. Be careful not to sand in the same area for too long as this can damage the surface.
Avoid the urge to sand the entire surface with one swipe, which can lead to uneven sanding. Take your time and try to avoid removing any protective coating that may be on the furniture.
Step 5: Clean Up Your Patio Furniture Surface
Once you’re done sanding all the furniture, you’ll notice fine particles of sand dust everywhere! To clean up this debris, you can use a sponge and water bucket for this step, but because there’s probably a lot of it, wiping it off can take time.
A quicker alternative to removing all the sanding dust in one go is simply to rinse it off with a hose.
Once that’s out of the way, wipe the surface with a clean towel. Then, set the furniture aside and leave it to dry completely.
Step 6: Finish Your Patio Furniture
The last step of removing the oxidation layer is to finish the furniture. We do this by spreading a layer of polishing wax on the cast aluminum surface. Not only does this protect the furniture, it can also smooth out any bumps from the sanding.
So, grab a microfiber towel and dab it into the wax. Make sure you only get a small amount on the towel. Adding too much can make the surface slippery.
Work the wax into the surface of the cast aluminum using small circular motions just like you did when you were sanding. When you’ve covered the entire surface, set the furniture aside to dry for a few hours.
You can also use a buffing wheel attached to a power drill or other rotary tool for quicker results.
Repairing Paint Chips on Cast Aluminum Patio Furniture
If there are only a couple of scrapes on the patio furniture, you may want to opt for a touch-up paint job using the steps below. If you have widespread paint damage across the furniture, you can follow these same steps but will need to perform it across the entirety of the piece.
Also, sometimes powder-coated furniture can be a bit more challenging to repair and could require some additional steps to repaint it.
Step 1: Gather Your Materials
Painting cast aluminum patio furniture requires a few additional materials than when removing oxidation.
You’ll need:
- Tarp
- Wire brush
- Etching Primer
- Touch Up Paint (or Spray Paint)
- Polishing wax
- Water
- Dish Soap
- Sandpaper (220-grit)
- Microfiber towel
- Masking tape
- Paint brush or foam roller
- White Spirits (optional)
- Face mask
- Gloves
Step 2: Prepare Your Patio Furniture
To start, give the furniture a thorough cleaning with a mixture of water and dish soap.
Peel off any loose or flaky sections of paint with your hands.
Next, put on your safety glasses, face mask and gloves.
Scrub the area with a wire brush to help remove dirt from under the chipped paint. Use a fine sandpaper to sand the area where the paint is chipped, making sure to smooth out any rough edges or bumps.
Finally, wipe away any sanding dust with a microfiber towel.
Step 3: Prime Your Patio Furniture
Before you paint cast aluminum, you need to prepare it with primer to ensure the paint will adhere properly. An etching primer or epoxy primer is recommended for cast aluminum.
Grab a paintbrush or foam roller and dip it into the primer. Then, add a thin layer to the surface of the furniture.
Make sure it’s even and smooth. The presence of lumps may mean you’ll have to sand it again.
Wait for the primer to dry before moving on to the next step.
Step 4: Paint Your Patio Furniture

If you’re only trying to touch-up small areas, it may be somewhat difficult to find an exact color match of paint. Fortunately, you can bring a small flake of paint from your furniture to the paint store so that they can formulate an exact match. Always test the paint in a small area before going full bore.
Purchase a paint that is designed for metal surfaces. Epoxy-based paint is often the most durable for outdoor furniture, although acrylic is also suitable.
Before painting, you can use masking tape to protect areas around the repair. The tape can also help you create sharp lines and clean edges on the furniture itself.
Use a small brush or foam roller to apply a thin coat of paint to the primed area. Allow the paint to dry completely before applying additional coats, if necessary.
Alternatively, you can consider using spray paint if you’re able to find an exact match off the shelf. If applied properly, it will provide a smooth uniform finish; however, it may be challenging to control splatter onto other areas of the furniture.
Apply spray paint in short bursts. Try to avoid the paint from dripping onto the surface because it creates lumps and makes the surface uneven.
Remember, thin coats will dry much faster. So, it may be a good idea to spray the furniture once, then give it a few minutes to dry before moving on to the next coat.
You may have to apply quite a few coats to increase the opacity of the color.
Step 5: Finish Your Patio Furniture
After the paint dries, gently remove all the masking tape from the furniture. This is a good time to check for paint streaks.
If you find any, don’t worry, you can easily remove them with a little white spirit. Soak a cotton swab in the solution and slowly dab it on the surface to dissolve the paint.
The final step is adding some polishing wax to protect the furniture and paint against the elements. Use a microfiber towel and polishing wax to spread even layers on the surface of the cast aluminum furniture.
Maintaining Cast Aluminum Patio Furniture
Even though cast aluminum furniture is durable, it does require regular maintenance. Washing the furniture with soapy water regularly will help prevent build up of dirt and grime, which could eventually affect the protective coating.
Perform routine inspections of the furniture to identify stains or chipping paint. For stains, try using a vinegar solution or commercial cleaner to remove them before they become more embedded.
Repair any chips or cracks early on to prevent them from causing further damage.
You should consider routine application of a protective coating, such as wax or metal sealer. This will help protect the furniture from the elements and keep it looking new.
Finally, you should consider using a furniture cover to help protect it against unfavorable weather. If you live in a snowy region, moving the furniture indoors during the winter can help slow down the oxidation process and keep your furniture looking good as new.
Final Takeaway
The first step in determining how to restore cast aluminum patio furniture is to identify the issue. Based on the issue, you can take the appropriate course of action.
If you’re dealing with a chalky oxidation layer, sanding is the way to go. You’ll have to remove the film with sandpaper and some brute force.
If flaking paint is the issue, you’ll still need to sand a bit. But, more importantly, you’ll need to find a matching colored paint to apply.
Use a layer of polishing wax to help protect the surface and give the patio furniture a nice shiny finish. And, then kick back and relax on your refinished cast aluminum patio furniture!
Happy Lounging!
Husband and father of three (actually, four if you include the pool). I’m an avid DIY-er and weekend warrior that enjoys taking up new projects around the house to help us maximize leisure right at home. I enjoy researching and sharing various tips, tricks and knowledge to help others make their home an oasis.